Summary: No web mail clients can beat Gmail. The Google service offers data security, integrity, and much more. If you are thinking of shifting from AT&T Cloud Mail to Gmail, you have landed to the right platform. The article will guide you significant ways to move AT&T Cloud Mail to Gmail.
Are you using AT&T Cloud Mail? If yes, you may be aware of its functions. If you aren’t, here is a little introduction to the application. Like Gmail, AT&T Cloud Mail is a cloud-based email service offered by AT&T to business users. It is a reliable, scalable, and secure email hosting solutions. It is popular among small and medium-sized businesses.
Like Gmail, users of AT&T Cloud Mail can also have custom email. They can go for custom email domains. The cloud tool offer protection from spam emails and viruses. The data is in cloud and you can access your data from any device including smartphones. The hosting tool offers incredible features like task lists, address books and calendars. It allows users to collaborate to work together.
Gmail, on the other hand, doesn’t need introduction. The popularity index of Gmail is more than ten times higher than AT&T Cloud Mail. Gmail is free and paid. If you go for paid Gmail, you can enjoy multiple storage and other custom features.
Table of Contents
Reasons to Move from AT&T to Gmail
Below is a variety of reasons that attract users to choose Gmail over AT&T Cloud. Let’s dig out those reasons. You can write us the reason that prompts you to switch from AT&T to Gmail.
- The storage capacity of AT&T is less than Gmail. You can use Gmail for up to 15 GB for free.
- The search feature of Gmail is advanced to filter specific emails and attachments.
- Gmail is probably available in almost all Android phones. It is easy to download and run Gmail compared to AT&T on your phone.
- If you want to get other services of Google like Google Drive and Calendar, AT&T to Gmail conversion is one of the best measures.
Manual Conversion of AT&T to Gmail
The manual process requires technical skills and it is time-consuming. Here you can take help of Forwarding IMAP. Follow the below steps carefully.
- Access to your Gmail account where you want to export AT&T emails.
- Click on the Setting gear icon and select “See all settings”.
- Hit the “Accounts and Import” tab and go for further steps.
- Hit the Add Mail Account tab and the email address where you want to transfer your Gmail account data.
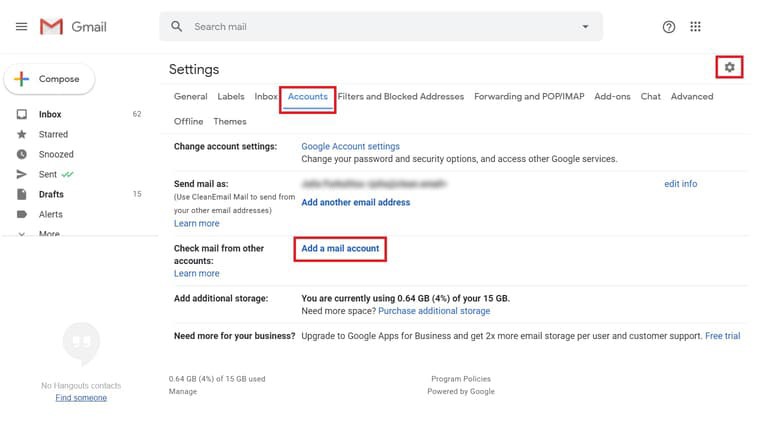
- From the “Add Mail Account” tab, you can import your AT&T emails to Gmail. You can use Gmailify from AT&T to Gmail.
Note: Gmailify allows you to use Gmail address, users can manage emails of both platforms. In several, users may select the account (POP3), but they can also consider “Link accounts with Gmailify.”
- Now, you have received the second login request for AT&T that you can verify them by pressing the buttons Press.
- Now, get back to the settings page of your real account (step 2), you can see the approved forwarding message.
- Press the save button to complete the process.
Conversion Automatically for AT&T to Gmail Account
Without discussing much, we want to draw your attention to a significant application, named GaintTools Cloud Migration Tool.
If you have ever searched a converter program on Google, you may have come across a GainTools application. The migration tool supports several incredible features.
Significant Features of the app
- Cloud to cloud migration is offered by the application
- Require the port numbers and credentials to automatically connect for conversion
- Allow users to export data from selective folders or entire folders
- Save the exported data to an existing folder or create a new folder
- A single panel application
Also Read:- Transfer Self Hosted emails from Domain to Gmail Account
Steps to Use the Program
- Launch the application
- Provide the credentials, host, port, and Authenticate Me tab of AT &T Cloud on the left pane
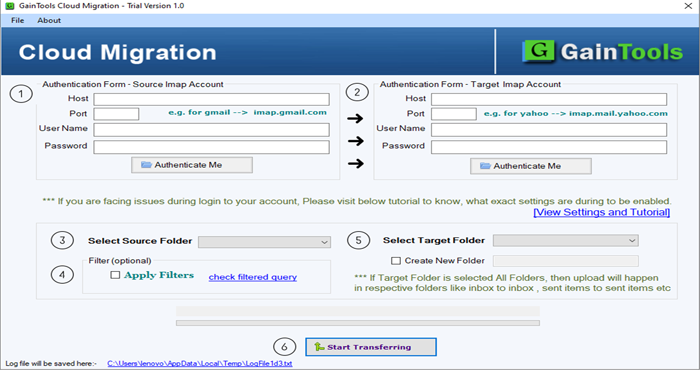
- On the right pane, provide the credentials of Gmail account and press the Authenticate Me tab
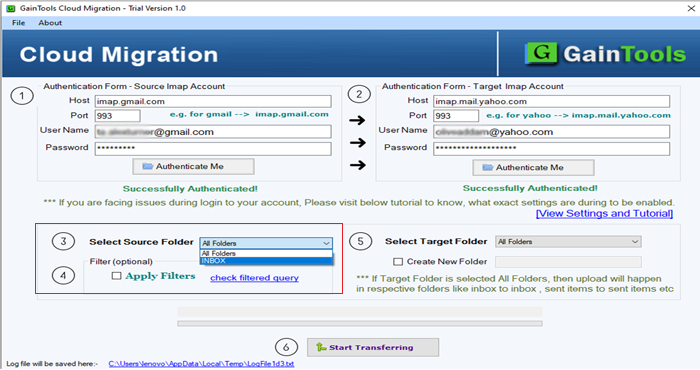
- Select the source folder of your AT&T from the arrow button of the Select Source Folder
- In the Select Target Folder, click on the arrow button to choose an existing folder or create a new folder
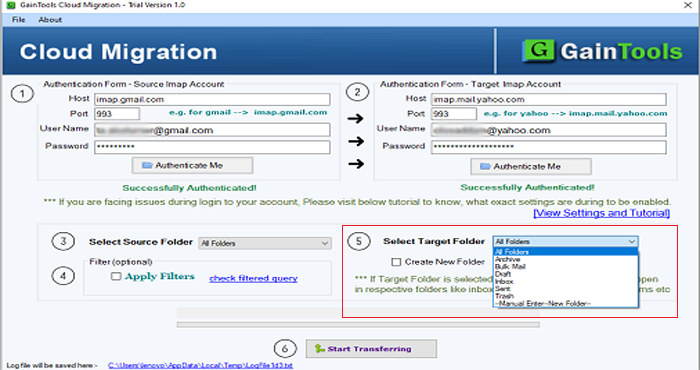
- Hit the “Start Transferring” button
Conclusion
A third-party application is a suitable application to export from cloud to cloud. The utility transfers data swiftly.

