We all know that database corruption in Exchange Server is a very common issue. When the database dismounts or goes down due to corruption, users can’t access their mail accounts. Thus, in this post, we will understand how one can repair the corrupt Exchange database using the Eseutil utility. Also, we state the disadvantages linked with this Eseutil utility and recommend you one of the best solutions to fulfill your needs.
Table of Contents
Reasons for Exchange Database Corruption
Mainly, the reasons for Exchange Server database corruption are categorized into two parts:
- Physical corruption
- Logical corruption
Physical Corruption: This occurs due to corrupted drives or hardware issues. A few physical corruption errors are mentioned here:
- Failed to mount Exchange Server
- 1022 (JET_errDiskIO)
- Exchange jet error 1216
- Exchange jet error 1018
- 501 Jet_errLogWriteFail
Logical Corruption: This occurs due to damaged database objects. It may occur when users face corruption in the file header at the application level. It affects the Exchange database due to which users face inaccessibility of the Exchange Server.
Know about Eseutil and steps to repair corrupt Exchange database with Eseutil
Eseutil is a command-line utility that gets installed during Exchange Server. It assists administrators to repair minor corruption issues. It also helps admin users to diagnose the DB problems & maintain DB health.
Steps to Repairing Exchange database via Eseutil
There are multiple functionalities that can be used with Eseutil.
- To repair corrupt Exchange Server database – Eseutil/p
- To restore the database by replaying transaction log files – Eseutil/r
- For hard recovery in MS Exchange – Eseutil/c
- Copy database & log files – Eseutil/y
- To check the database integrity– Eseutil/g
- To perform a checksum test to verify pages in the database – Eseutil/k
- To display headers, checkpoint files, or logs – Eseutil/m
- To help users in defragmentation of the database – Eseutil/d
Step 1. Locate Eseutil on the Exchange Server
The prime step for repairing the Exchange database is locating EseUtil.exe. You can check it in the bin directory of the Exchange installation.
The default location of Eseutil in MS Exchange 2016 & 2013 is:
C:\Program Files\Microsoft\Exchange Server\V15\Bin\
This location will vary as per the versions of the Exchange Server you are using.
Step 2. Check the status of the Exchange database
The next step is to check the state of the corrupt database. For this, first, open the Exchange management shell as an administrator and change the directory path to the location of Eseutil with the given command:
cd C:\Program Files\Microsoft\Exchange Server\V15\Bin\
Then, run this command:
Eseutil.exe/mh/<database file path>
This command will show the database header. Check the state field in the list. If you find it in dirty shutdown status, then repair the Exchange database. However, if you find it in clean shutdown, then the database is in a healthy state & can be mounted to the server.
Step 3. Perform soft repairing the Exchange database
This recovery is helpful only when there are minor corruptions in the Exchange database. This command will replay the transaction log files & keep the database in a clean shutdown state from a dirty shutdown state.
Here is the command:
Eseutil/r <database file path>
This process may take time depending on the performance & size of the database.
Step 4. Verify the status of the database again
Now, check if the above process successfully repairs the corrupt DB or not. The command for this is:
Eseutil.exe/mh <database file path>
If the state is clean shutdown, then you can mount the database. But if it is still in a dirty shutdown state, then you have to perform a hard database recovery.
Step 5. Perform hard recovery
When the software recovery on the database failed to repair it, then you have to perform the hard recovery using /p parameter. But keep in mind that this process involves high data loss risk as it deletes all irrecoverable data from the database. Also, you will get a warning of data loss before starting the process.
Here is the command for the same:
Eseutil/p <path to the database>
After this process, the Exchange database will be repaired successfully. However, you may lose your important data during the recovery process.
A Perfect Method to Repair Corrupt Exchange EDB
When we talk of the safest and quick solution to repair Exchange EDB, then the automated solutions come to mind first. One such solution is GainTools Exchange Recovery Tool. This software performs the repair task without the risk of data loss. With the friendly layout and simple steps of this application, the recovery of a corrupt Exchange database can be completed quickly.
This program provides you with seamless recovery without any trouble. It ensures that all damaged or corrupt database is repaired and retrieved in a healthy state. You have multiple options to save the recovered data of the Exchange Server. Also, this remarkable tool works comfortably on all editions of the Exchange Server.
Steps to fix the Corrupt Exchange Database using professional software:
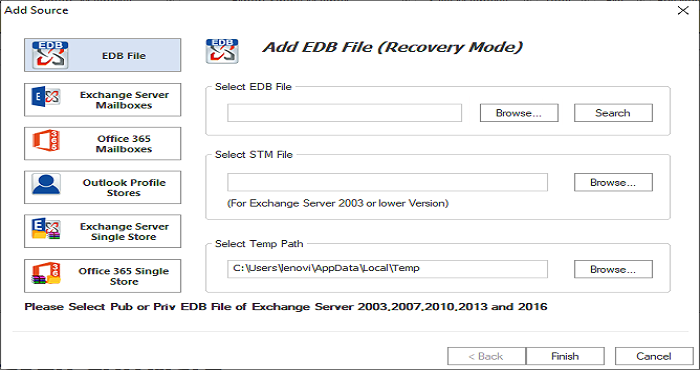
- Install and run Exchange database repair software on your system.

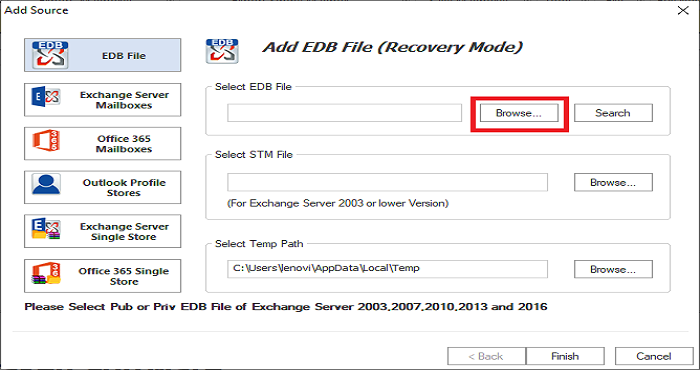
- Now add the Exchange database file (.edb) which is damaged or corrupt.

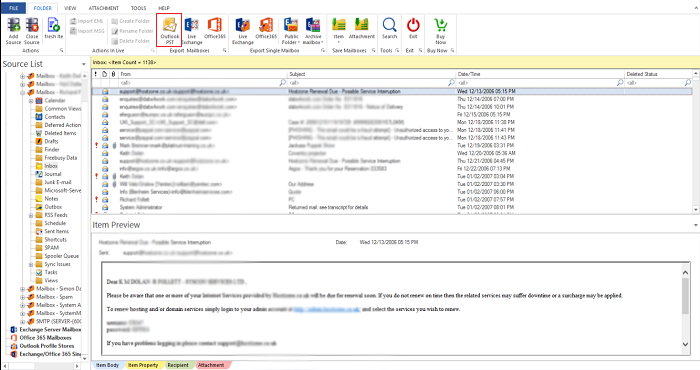
- Choose desired data to recover.
- Pick the required format like PST in which you want to save the recovered data.
- Mention a targeted location to save the recovered data.
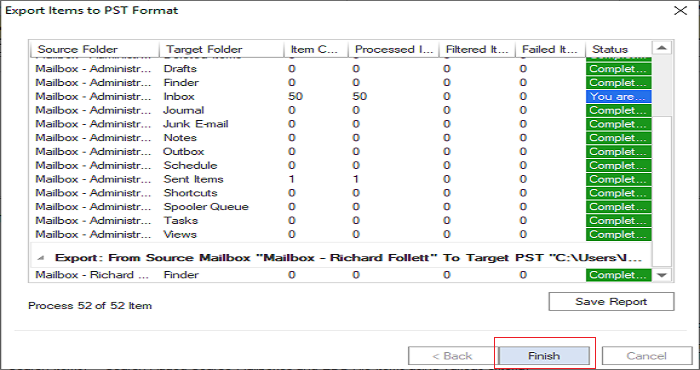
- Get a complete report of the process on the screen and hit Save Report.

- Finally, press the Finish button.

This is how the software performs corrupt Exchange database recovery in a few simple steps taking a few minutes.
Conclusion
Repairing the MS Exchange Server database is a complex task for users if they don’t find the right solution. Some users opt for the Eseutil utility but it is not always workable. Also, the process with it is complex & involves high data risk. Therefore, the perfect solution is an automated solution which we have explained in this post to make the process simpler & safer for you. Also, you have a free option of testing the program by recovering & saving the first 50 items per folder.

